I have come up with a few different ways to make 2-dimenstional feathers in Blender. The method that follows is the best way I know how to do this. The feathers don’t have to be perfect; the more perfect I try to be perfect to the reference image, the more imperfect it looks once assembled. The goal here is repeatability, consistency, and time-efficiency. Here’s a preview of what we will do.
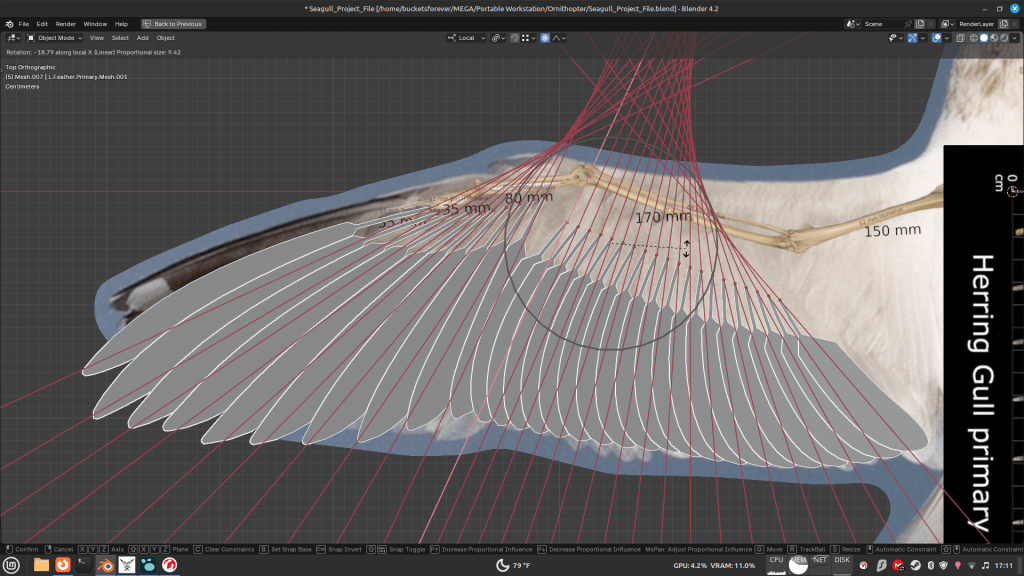
Start with a picture of a bird’s outstretched wing with skeleton overlaid. Add a Bézier curve, do not scale it down. Instead, enter edit mode and move the ends of the curve where you want them. The ends of the curve should be at the ends of the first Secondary Feather in the reference image. Enter object mode and snap the curve’s origin to the 3D cursor. Tilt the curve 90deg so that the flat side faces up on the Z-axis. Change resolution to have correct number of segments, this time 12 segments. Make sure the Mean Radius = 1.000. Extrude the curve by .002 from the properties panel to make spine width of 4mm. The flat faces should orient along the Z-axis. Adjust the curve handle rotation in the XY-plane to align with the feather Rachis.

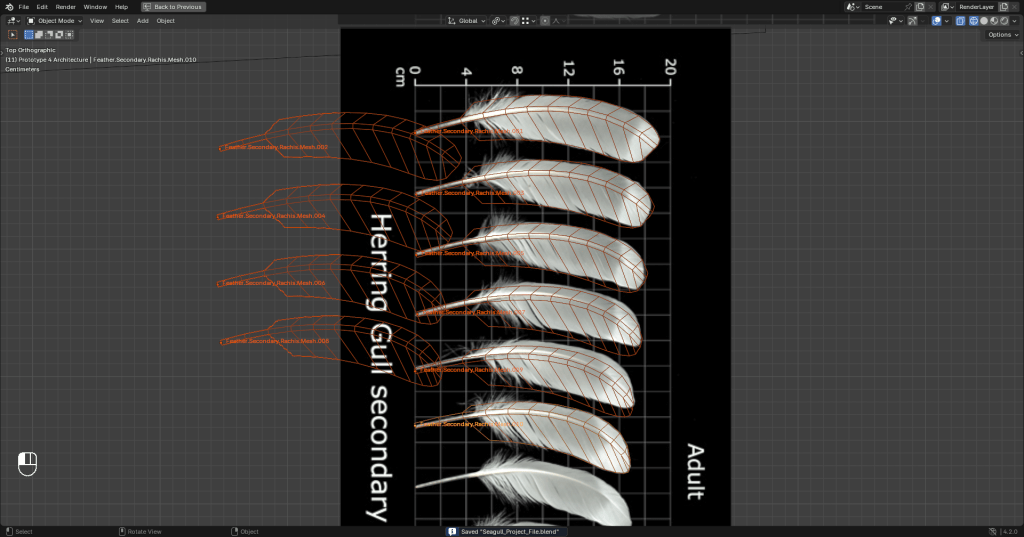
Now that we have a curve that looks roughly like a feather spine, duplicate it once and place it on the middle Secondary Feather (or whichever is smallest), and again on the last Secondary Feather. Convert the curves to mesh, keep originals, and hide originals. Convert the three curves to meshes, and call them L.Feather.Secondary.Mesh.001, *.010, and *.020. Now that we’ve got the naming convention in order and all the objects are in their own collections, it’s time to start shaping the vanes.
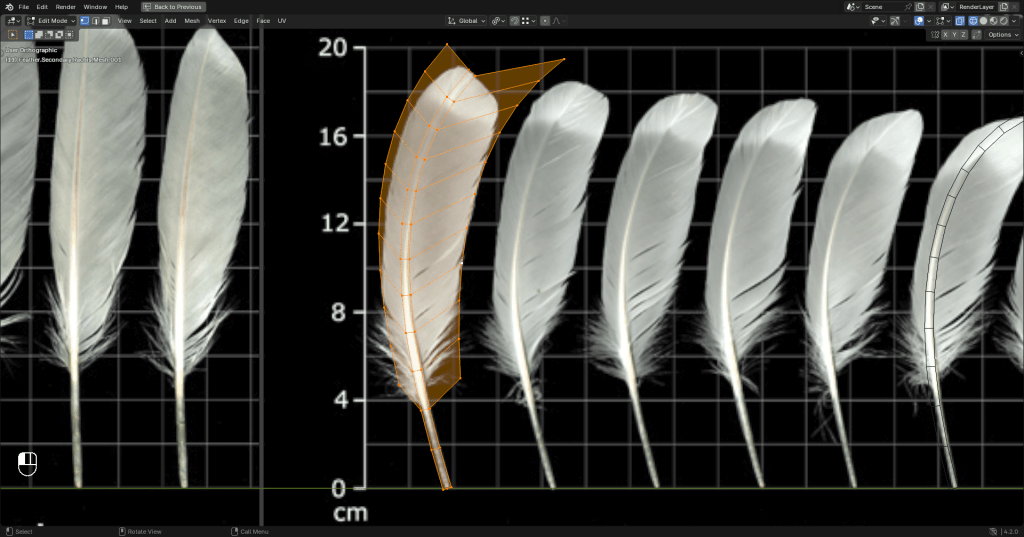
Extrude the edges of the mesh to make the feather vane. The trick is to shape the vane without affecting the Rachis. It is good to select the Rachis vertices in edit mode and hide them now. I find it is best to move each extruded edge along the Y-axis, then using proportional editing to grab just the rightmost vertices of these edges and fit the edges to the curves of the reference image. The other way to do this is to duplicate the edges of the Rachis mesh and, using proportional editing with “Connected Only” checked in the menu, without hiding the Rachis, which might help you visualize the big picture.
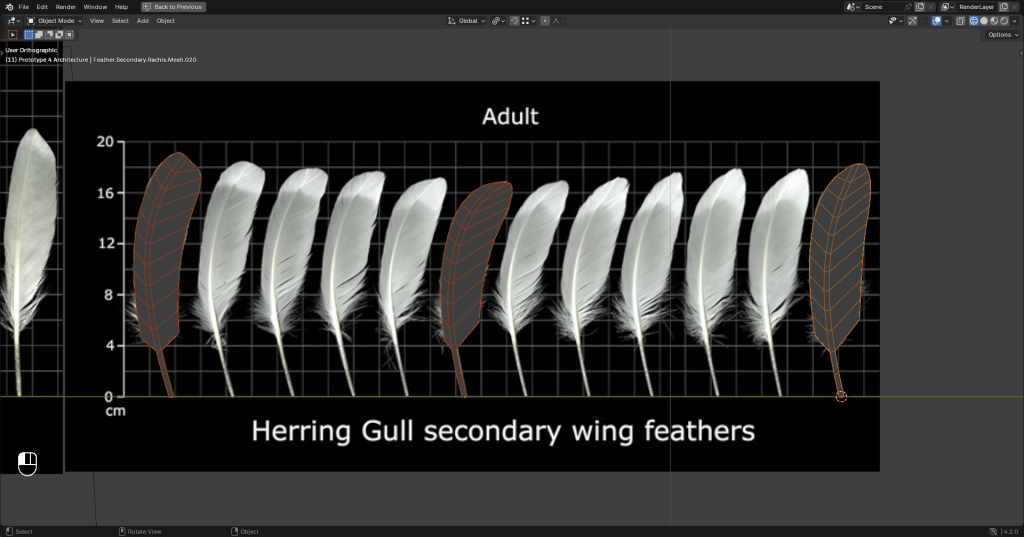
Select one feather that you want as the base, and then shift-select the feather you want to be shaped. In the object data properties tab, go to the shape keys dropdown, and selecting the Shape Key Specials menu, and Join as Shapes. Duplicate the first feather 8 times. Adjust the Value for each feather between 1 and 10 such that they morph from one to the other 8 times, ending with Value of 1 for the 10th feather. Do the same with the 10th feather to the 20th feather, but this time, duplicate the 10th feather 9 times, so that you have feathers 001 to 020. Apply all Shape Keys.
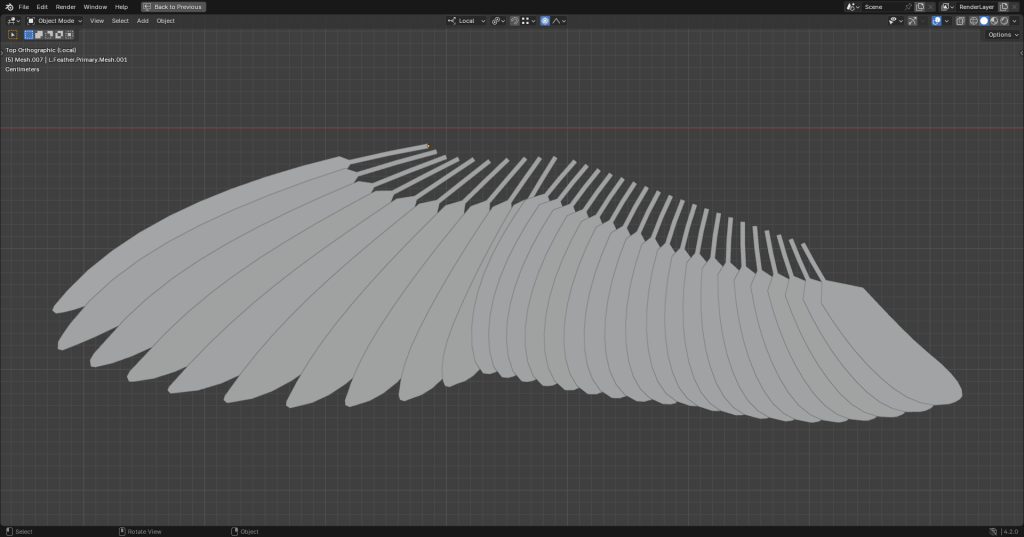
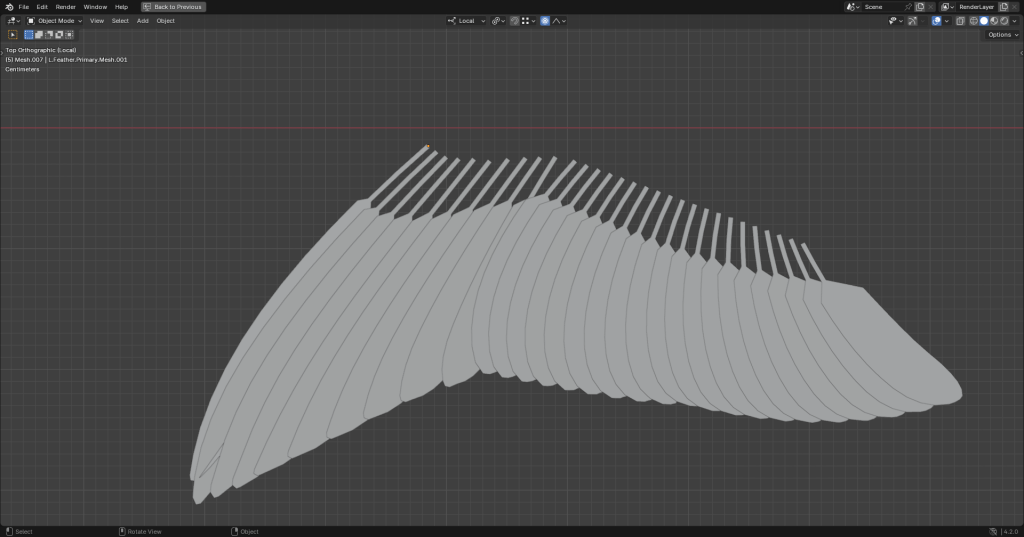
Now you should have 20 Secondary Feathers each have their own origin, be their own object, and can be grabbed and rotated into place on the wing. Here they are, Primary and Secondary Feathers. That’s a lot of wing surface area!
Next time, I add several layers to each feather and get them ready for printing!
